What you will achieve
- Locate File, Hydraulics, and Tools.
- Connect the selected element with its panel and the legend.
Before you start
- Open WatDis and load an INP to practice with a visible network.
- Run a steady-state calculation before inspecting hydraulic results.
01
Menus organize the actions
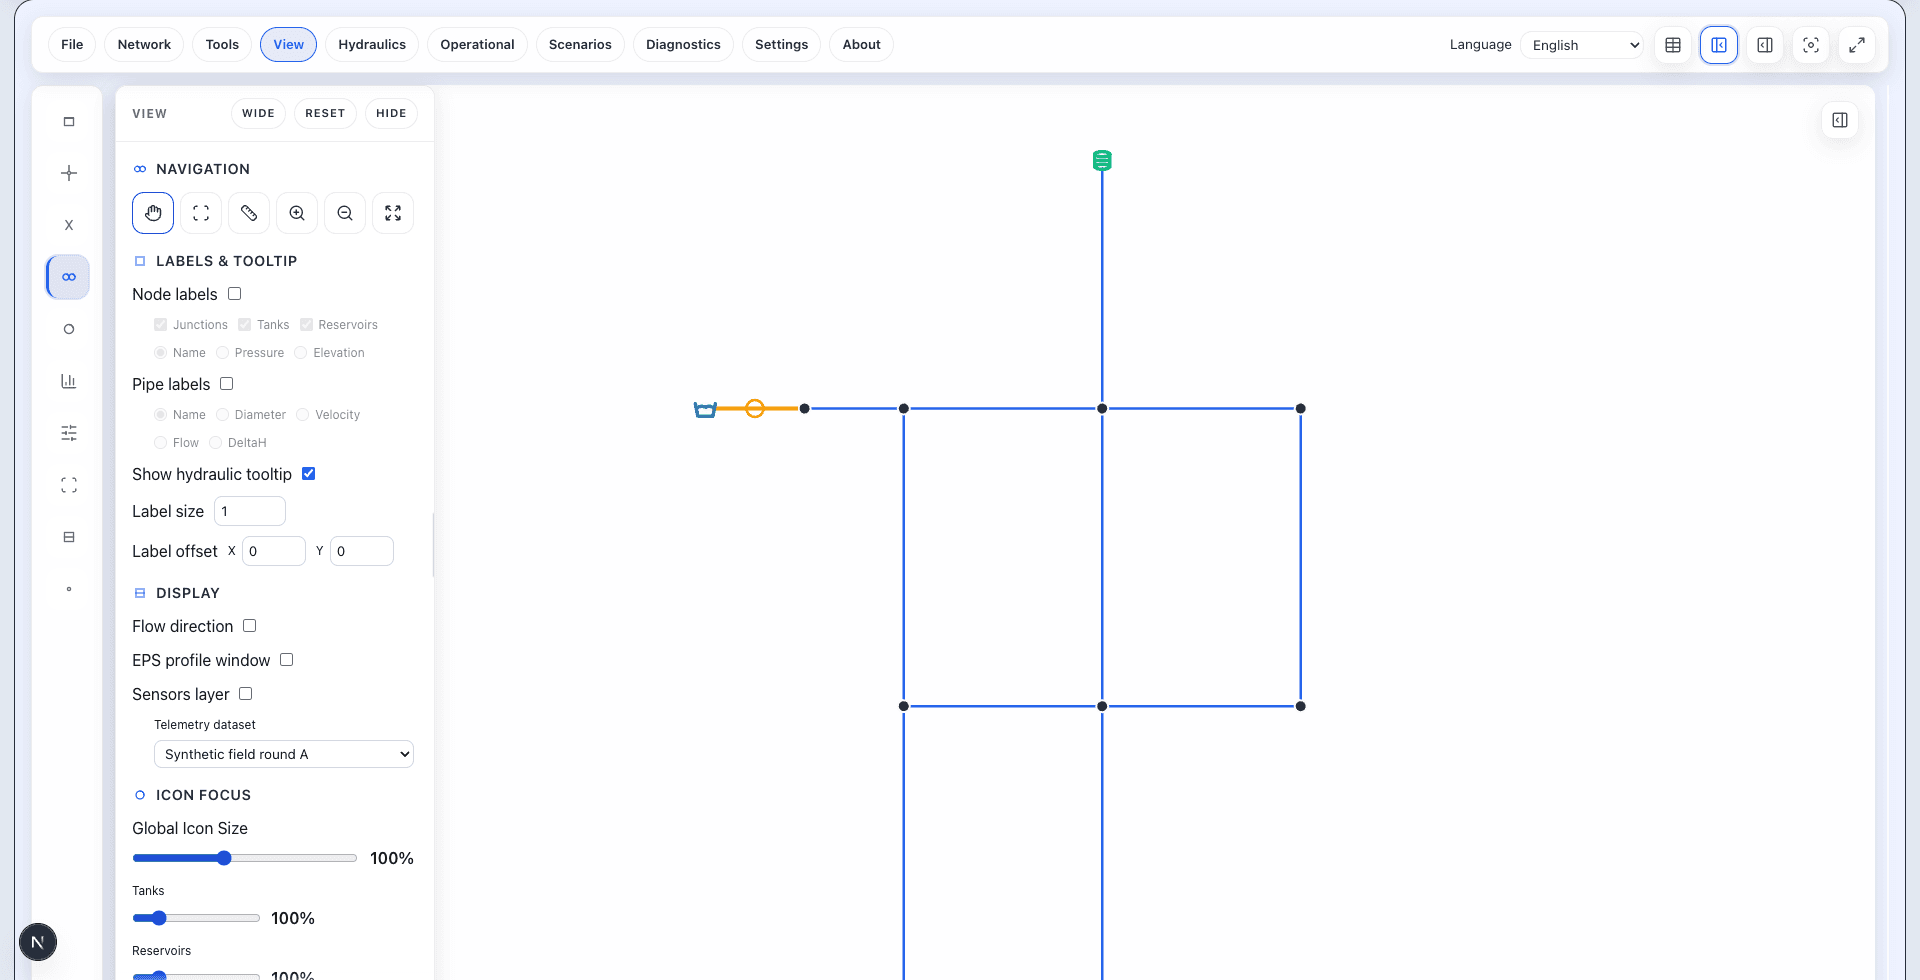
File contains the import workflow. Hydraulics contains Run Steady. Tools lets you return to element selection after using another tool.
- File → Import EPANET: load the .inp file.
- Hydraulics → Run Steady: calculate the loaded model.
- Tools → Select: inspect an element on the canvas.
02
The canvas locates each element
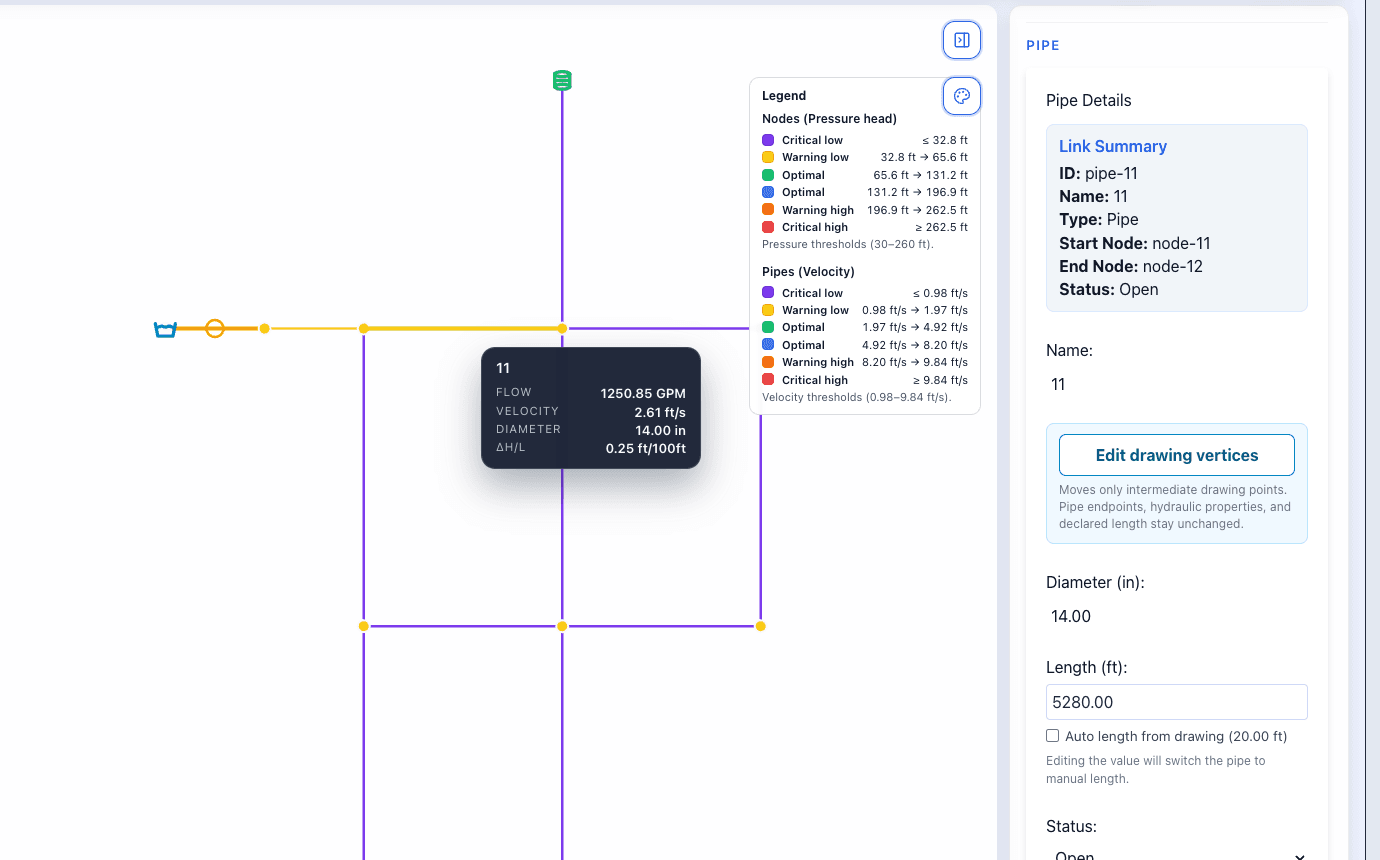
The network occupies the central area. Move to the element you want to inspect and select it. Check its name or ID before reading its properties.
- Nodes and links represent different network elements.
- The selected element and the panel ID should match.
- The size of the drawing on screen is not a hydraulic-length measurement.
03
Panel, tooltip, and legend work together
The legend explains the colors. The panel and element tooltip let you read exact numbers. Always read the unit alongside the value.
- Read diameter and length as pipe input data.
- Read flow and velocity as calculated results.
- A color band points to an area to inspect; it does not confirm a problem on its own.
Do it in WatDis
- Select pipe 11 if you are using the tutorial model.
- Find its ID, diameter, and length; then identify the flow and its unit.
- Compare the network color with the corresponding legend.
Common mistakes
Reading another element's panel
Check the name or ID whenever you change the selection.
Remaining in an editing tool
Return to Select before trying to inspect properties.